The Burr Grinder: Your Most Important Coffee Investment
Every coffee expert agrees on this point: buy a burr grinder before you buy an expensive brewer. Blade grinders chop beans randomly, producing particles ranging from fine powder to large chunks. This inconsistent size leads to uneven extraction, where small particles over-extract into bitterness and large particles under-extract into sourness. Burr grinders crush beans between two abrasive surfaces, creating uniform particles. For beginners, the best value is a conical burr hand grinder like the Timemore C2 or 1Zpresso Q2, priced between 60−100.Thesemanualgrindersproduceexcellentconsistencyforpour−over,AeroPress,andFrenchpress.Ifyoupreferelectric,theBaratzaEncore(150) is the industry standard entry point. Avoid grinders under $50 that claim to be burr grinders but use false or cheaply made burrs. Your grind setting matters as much as your coffee-to-water ratio. Practice with one bag of beans, brewing the same coffee at different grind settings, until you can identify the difference between too fine (slow drawdown, bitter taste) and too coarse (fast drawdown, sour taste). A good grinder will last 5-10 years with basic maintenance.
The Digital Scale: Precision Brewing Without Guesswork
You cannot achieve consistent results without measuring your coffee and water by weight. A digital kitchen scale accurate to 0.1 grams costs only 15−25buttransformsyourbrewingimmediately.Volumemeasurementsliketablespoonsorscoopsvarywildlybasedonbeandensity,roastlevel,andgrindsize.Darkroastsarelessdensethanlightroasts,soatablespoonofdarkroastweighslessthanatablespoonoflightroast.Weighteliminatesthisvariable.Lookforascalewithabuilt−intimer,aminimumcapacityof0.1grams,andamaximumofatleast2,000grams.TheHarioV60DripScale(50) and the Timemore Black Mirror ($60) are premium options. moodtrapcoffeeroasters However, a basic kitchen scale from Amazon works fine for most methods. Use the scale to weigh your whole beans before grinding, then place your brewer and carafe on the scale, tare it to zero, and pour water directly while watching the weight. This technique, called pour-over by weight, gives you perfect control over your ratio. Do not trust the markings on your coffee maker’s water reservoir, as they are often inaccurate by 10-20%. With a scale, you can replicate your best cup every single time.
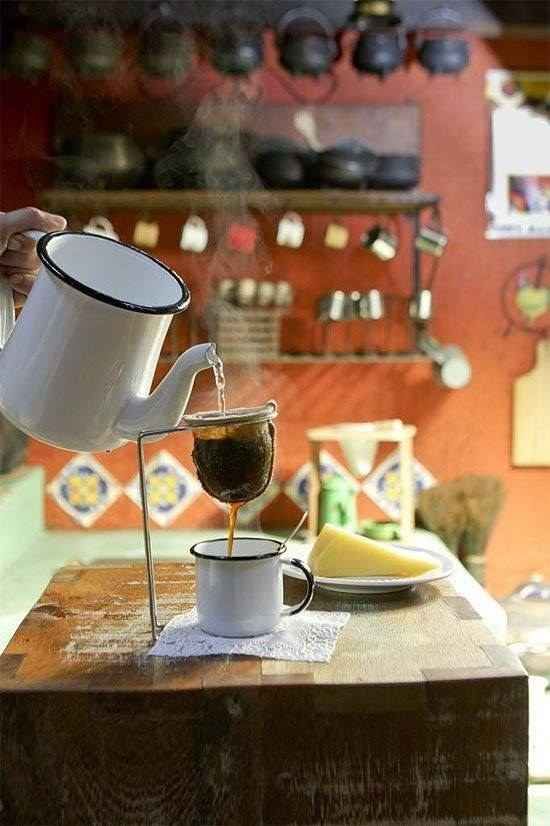
The Gooseneck Kettle: Precise Pouring for Even Extraction
If you plan to make pour-over coffee (V60, Chemex, Kalita Wave), a gooseneck kettle is non-negotiable. The long, curved spout allows you to control water flow rate and direction with precision. Standard kettles dump water in a chaotic stream that disturbs the coffee bed, causing channeling where water rushes through cracks and leaves dry pockets. A gooseneck lets you pour gently in concentric circles, saturating all grounds evenly. Stovetop goosenecks like the Hario Buono (60)heatwateronanyburner,butyoumustuseathermometertomonitortemperature.Electricvariable−temperaturegoosenecksliketheFellowStaggEKG(165) or Bonavita ($80) let you set exact temperatures from 140-212°F. This matters because light roasts extract best at 205°F, while dark roasts require cooler water around 195°F to avoid bitterness. For French press or AeroPress, a gooseneck is helpful but not essential. Beginners without a gooseneck can use any kettle and pour slowly over the back of a spoon to diffuse the water stream. Upgrade to a gooseneck when you feel ready to improve your pour-over technique.
Your First Brewer: Choosing Between French Press, AeroPress, or Pour-Over
Beginners should start with one versatile, forgiving brewer. The French press (20−40)isthemostintuitive:addcoffee,addhotwater,wait4minutes,press,andpour.Itproducesafull−bodied,oilycupwithsediment.Cleanuprequiresrinsingthemeshfilteranddisposingofgrounds.TheAeroPress(35) is a plastic syringe-like device that makes 1-2 concentrated cups, similar to espresso but smoother. It is nearly impossible to make bad coffee with an AeroPress, and it cleans in 5 seconds by ejecting a solid puck of grounds. The downside is small batch size. The Hario V60 (10−20)isasimpleconethatmakesthecleanest,mostnuancedcupsbuthasasteeplearningcurve.Waterflowrate,pourpattern,andgrindsizeallaffectresults.Formostbeginners,theAeroPressoffersthebestcombinationofease,versatility,andportability.Itworksforhotcoffee,coldbrewconcentrate,andevenrecipesmimickingespressoformilkdrinks.Avoidcheapautomaticdripmachinesunder50, as they cannot achieve the correct water temperature or showerhead distribution. Buy a simple manual brewer and learn fundamentals first.
Accessories That Improve Your Coffee Without Breaking the Bank
A few inexpensive accessories dramatically improve your daily coffee. First, buy a water filter pitcher or use filtered water. Coffee is 98-99% water, so chlorinated tap water or hard well water ruins even the best beans. Second, purchase an airtight coffee storage canister with a one-way valve. Keep beans whole, away from light, heat, and moisture. Never store coffee in the refrigerator or freezer unless you have a vacuum-sealed container, as condensation damages the oils. Third, get a simple kitchen thermometer ($10) unless your kettle has temperature control. Water at a rolling boil (212°F) is too hot for most brewing. Let it rest 30 seconds after boiling to reach 205°F. Fourth, buy unbleached paper filters if using a pour-over or AeroPress. Bleached filters can impart a papery taste if not rinsed properly. Fifth, consider a coffee subscription service like Trade or Atlas Coffee Club for 2-4 weeks after you have mastered your technique. These services send freshly roasted beans from different roasters each month, helping you discover your taste preferences. As your skills grow, you can add a milk frother, a bottomless portafilter for espresso, or a refractometer for measuring extraction yield. But start with the essentials: grinder, scale, kettle, one brewer, and fresh beans.